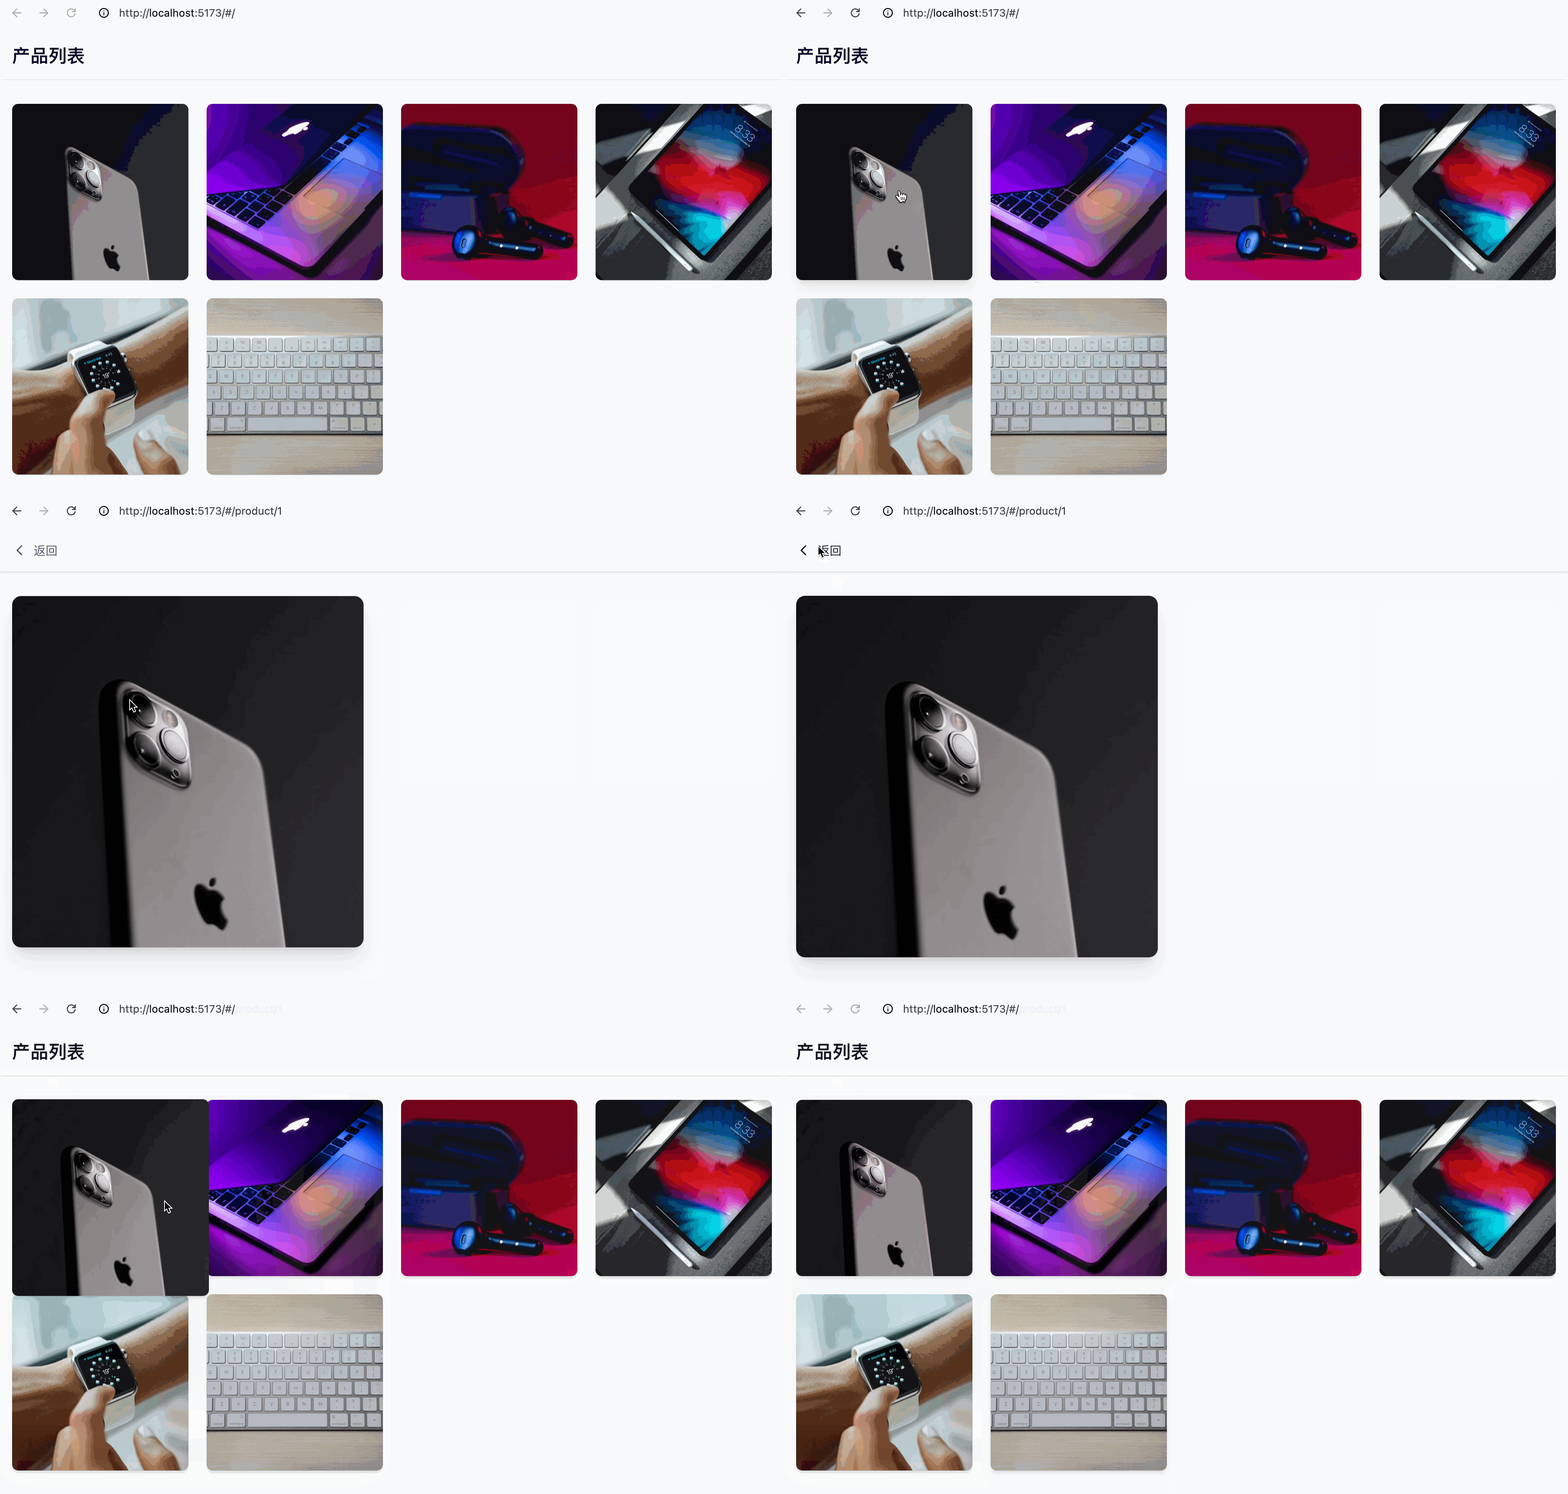
你好,Vue 开发者们!
在 Web 开发中,我们经常会遇到需要在不同页面间共享组件并实现平滑过渡动画的需求,比如购物车图标、用户头像、通知徽章等。你可能会想到用 Vue Router 的过渡动画,但它们往往不够灵活,或者用一些复杂的动画库,但它们又过于臃肿。
今天,我将向你介绍一个专为 Vue 3 设计的优雅页面间共享组件动画解决方案——vue-starport。
vue-starport 是什么?
vue-starport 是一个专为 Vue 3 设计的页面间共享组件动画库。它基于 Vue 3 的 Teleport 和 Transition 系统,让你可以轻松实现组件在不同页面间的”传送”和”变形”效果。
核心亮点:
- Vue 3 原生支持:完美支持 Vue 3 的组合式 API 和
<script setup>语法 - 平滑动画:基于 FLIP 动画技术,确保组件在页面间切换时的流畅过渡
- 简单易用:几行代码就能实现复杂的页面间共享组件效果
- 响应式设计:完美适配桌面端和移动端
- 高度可控:通过 Props 和事件,你可以完全控制动画的行为和样式
安装
将 vue-starport 添加到你的项目中非常简单:
npm install vue-starport
# 或者使用 yarn
yarn add vue-starport
快速上手:三分钟实现你的第一个共享组件动画
集成 vue-starport 只需要几行代码,让我们来看看如何快速上手。
1. StarportCarrier
将组件从 vue-starport 添加到你的根组件 ( app.vue)。所有使用都应该在组件内部进行。
<template>
  <StarportCarrier>
    <router-view />
  </StarportCarrier>
</template>

<script setup>
import { StarportCarrier } from "vue-starport";
</script>
2. Starport 组件
<!-- Home.vue -->
<template>
  <div class="min-h-screen bg-gray-50">
    <!-- 头部 -->
    <header class="bg-white shadow-sm">
      <div class="max-w-6xl mx-auto px-4 py-4">
        <h1 class="text-2xl font-bold text-gray-900">产品列表</h1>
      </div>
    </header>

    <!-- 产品网格 -->
    <main class="max-w-6xl mx-auto px-4 py-8">
      <div class="grid grid-cols-2 md:grid-cols-3 lg:grid-cols-4 gap-6">
        <div
          v-for="product in products"
          :key="product.id"
          @click="goToDetail(product.id)"
          class="cursor-pointer group"
        >
          <Starport :port="`product-${product.id}`" class="block">
            <div
              class="bg-white rounded-lg shadow-md overflow-hidden group-hover:shadow-lg transition-shadow"
            >
              <div class="aspect-square relative">
                <img
                  :src="product.image"
                  :alt="product.name"
                  class="w-full h-full object-cover"
                />
              </div>
            </div>
          </Starport>
        </div>
      </div>
    </main>
  </div>
</template>

<script setup>
import { ref } from "vue";
import { useRouter } from "vue-router";
import { Starport } from "vue-starport";

const router = useRouter();

// 产品数据
const products = ref([
  {
    id: 1,
    image:
      "https://images.unsplash.com/photo-1592750475338-74b7b21085ab?w=400&h=400&fit=crop",
  },
  {
    id: 2,
    image:
      "https://images.unsplash.com/photo-1517336714731-489689fd1ca8?w=400&h=400&fit=crop",
  },
  {
    id: 3,
    image:
      "https://images.unsplash.com/photo-1606220945770-b5b6c2c55bf1?w=400&h=400&fit=crop",
  },
  {
    id: 4,
    image:
      "https://images.unsplash.com/photo-1544244015-0df4b3ffc6b0?w=400&h=400&fit=crop",
  },
  {
    id: 5,
    image:
      "https://images.unsplash.com/photo-1434493789847-2f02dc6ca35d?w=400&h=400&fit=crop",
  },
  {
    id: 6,
    image:
      "https://images.unsplash.com/photo-1587829741301-dc798b83add3?w=400&h=400&fit=crop",
  },
]);

const goToDetail = (productId) => {
  router.push(`/product/${productId}`);
};
</script>
3. 在目标页面中接收组件
<!-- ProductDetailPage.vue -->
<template>
  <div class="min-h-screen bg-gray-50">
    <!-- 头部 -->
    <header class="bg-white shadow-sm">
      <div class="max-w-6xl mx-auto px-4 py-4">
        <div class="flex justify-between items-center">
          <button
            @click="goBack"
            class="flex items-center text-gray-600 hover:text-gray-900 transition-colors"
          >
            <svg
              class="w-5 h-5 mr-2"
              fill="none"
              stroke="currentColor"
              viewBox="0 0 24 24"
            >
              <path
                stroke-linecap="round"
                stroke-linejoin="round"
                stroke-width="2"
                d="M15 19l-7-7 7-7"
              ></path>
            </svg>
            返回
          </button>
        </div>
      </div>
    </header>

    <!-- 产品详情内容 -->
    <main class="max-w-6xl mx-auto px-4 py-8">
      <div v-if="product" class="grid grid-cols-1 lg:grid-cols-2 gap-12">
        <!-- 产品图片区域 -->
        <div>
          <Starport :port="`product-${product.id}`" class="block">
            <div class="bg-white rounded-xl shadow-xl overflow-hidden">
              <div class="aspect-square relative">
                <img
                  :src="product.image"
                  :alt="product.name"
                  class="w-full h-full object-cover"
                />
              </div>
            </div>
          </Starport>
        </div>
      </div>
    </main>
  </div>
</template>

<script setup>
import { ref, onMounted } from "vue";
import { useRouter, useRoute } from "vue-router";
import { Starport } from "vue-starport";

const router = useRouter();
const route = useRoute();
const product = ref(null);

// 产品数据
const products = [
  {
    id: 1,
    image:
      "https://images.unsplash.com/photo-1592750475338-74b7b21085ab?w=600&h=600&fit=crop",
  },
  {
    id: 2,
    image:
      "https://images.unsplash.com/photo-1517336714731-489689fd1ca8?w=600&h=600&fit=crop",
  },
  {
    id: 3,
    image:
      "https://images.unsplash.com/photo-1606220945770-b5b6c2c55bf1?w=600&h=600&fit=crop",
  },
  {
    id: 4,
    image:
      "https://images.unsplash.com/photo-1544244015-0df4b3ffc6b0?w=600&h=600&fit=crop",
  },
  {
    id: 5,
    image:
      "https://images.unsplash.com/photo-1434493789847-2f02dc6ca35d?w=600&h=600&fit=crop",
  },
  {
    id: 6,
    image:
      "https://images.unsplash.com/photo-1587829741301-dc798b83add3?w=600&h=600&fit=crop",
  },
];

onMounted(() => {
  const productId = parseInt(route.params.id);
  product.value = products.find((p) => p.id === productId);
});

const goBack = () => {
  router.push("/");
};
</script>
就这样!一个功能完整的页面间共享组件动画已经成功实现了。是不是超级简单?

Props 配置详解
vue-starport 提供了丰富的配置选项,让你可以精确控制动画行为:
Starport Props
| 属性名 | 类型 | 默认值 | 说明 |
|---|---|---|---|
| port | String | – | 传送门的唯一标识符,用于匹配 Starport 和 StarportCarrier |
| duration | Number | 600 | 动画持续时间(毫秒) |
| easing | String | ‘cubic-bezier(0.45, 0, 0.55, 1)’ | 动画缓动函数,参考 easings.net |
| keepAlive | Boolean | false | 是否在没有代理组件时保持组件存活 |
| mountedProps | Object | – | 代理组件挂载时应用的属性 |
| initialProps | Object | – | 代理组件挂载前应用的属性 |
StarportCarrier Props
StarportCarrier 组件不接受任何 Props,它作为所有 Starport 组件的载体容器使用。
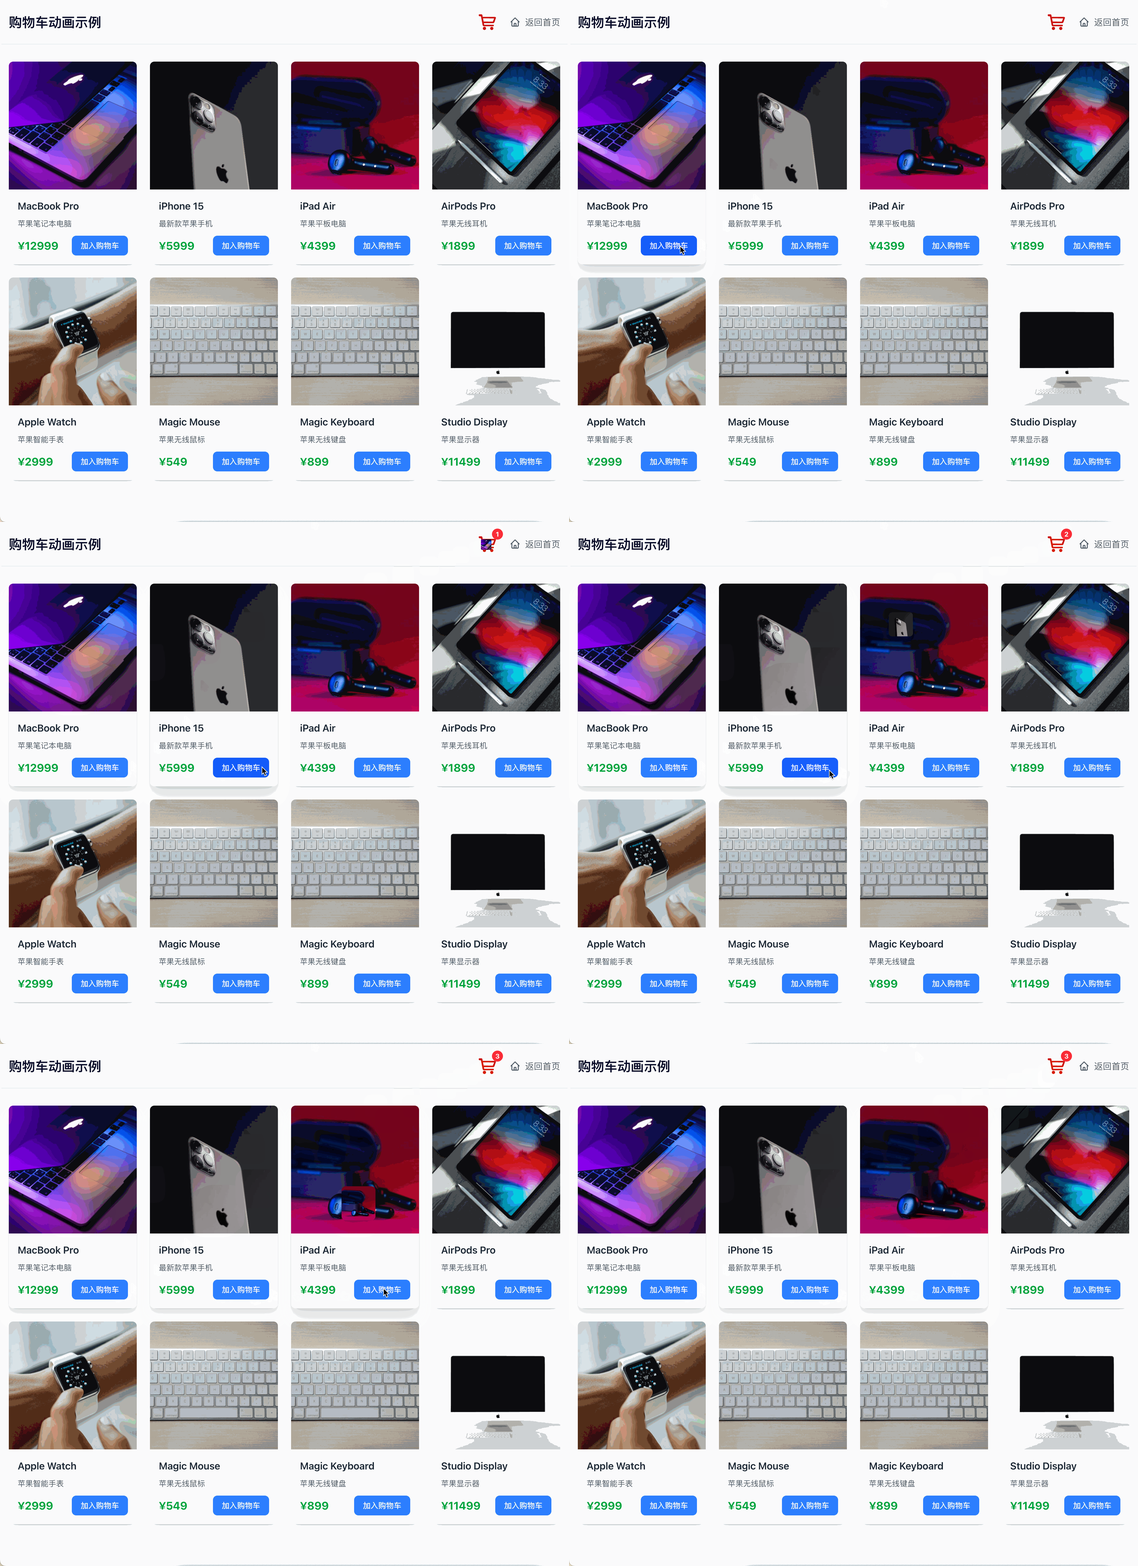
购物车动画示例

由于篇幅限制,示例源码:请关注公众号“前端开发技术前沿”,回复:“starport”即可。或者右上角直接下载。

❓ 常见问题
Q: 如何实现多个组件同时动画?
A: 可以为每个组件设置不同的 port 标识符,或者使用不同的动画时长来错开动画时间。
Q: 动画过程中如何保持组件状态?
A: 设置 keepAlive: true 可以保持组件状态,但要注意内存使用。
Q: 如何自定义动画效果?
A: 可以通过 CSS 类名自定义动画效果,或者使用 transitionMode 属性控制过渡模式。
Q: 动画卡顿怎么办?
A: 检查是否有过多的 Starport 组件同时动画,考虑减少动画时长或使用 will-change CSS 属性优化性能。
Q: 如何处理异步数据加载?
A: 可以在 after-enter 事件中处理数据加载,确保动画完成后再更新数据。
总结
vue-starport 为在 Vue 3 应用中实现页面间共享组件动画提供了一个极其简单而又强大的解决方案。它避免了复杂的动画库集成,也比一些重量级的动画框架更轻量、更灵活。
通过组合其丰富的 Props 和事件,你可以轻松构建出符合业务需求的、交互丰富的页面间共享组件动画。无论是购物车图标、用户头像还是通知徽章,vue-starport 都能完美胜任。
如果你正在寻找一个可靠的 Vue 3 页面间共享组件动画方案,vue-starport 绝对是你的不二之选!


评论0